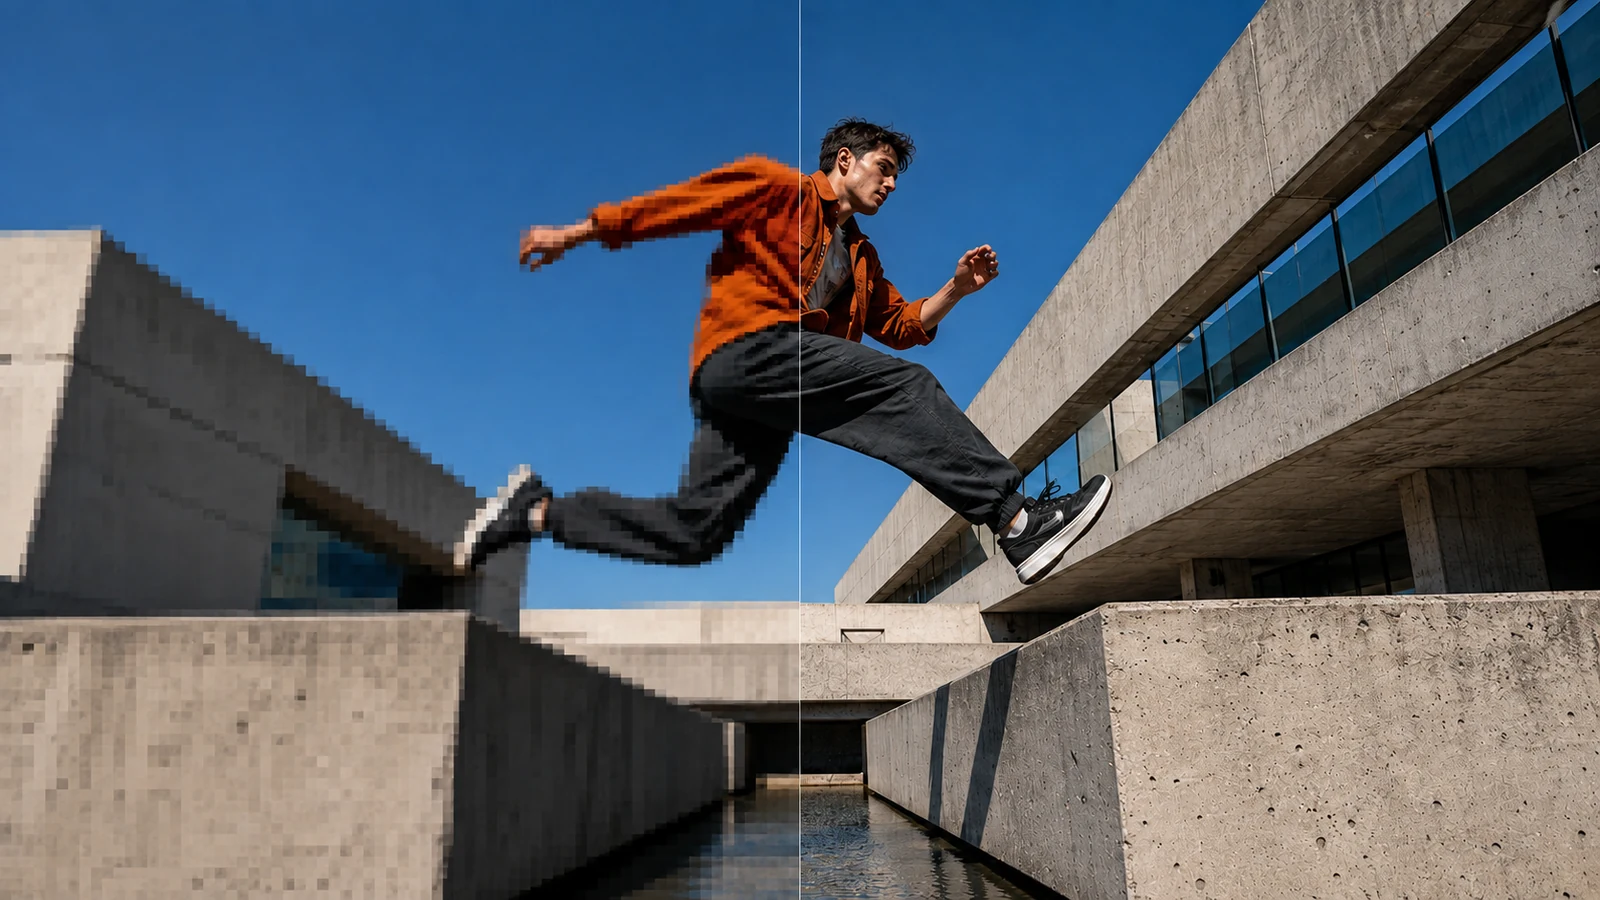
A video can be 4K and still look soft. It can also look sharper after AI enhancement while becoming less faithful to the shot you wanted.
Upscale when a larger delivery format or a visible improvement justifies it. Keep the original when enhancement changes faces, exaggerates textures or damages motion. Fix a broken shot before trying to make it sharper.
This guide explains how to choose between 1080p and 4K, evaluate an upscale fairly, and preserve a cinematic look. It is a production decision guide, not a hands-on ranking of upscaling tools.
What AI video upscaling actually changes
Video resolution describes the number of pixels in each frame. For standard 16:9 footage:
- 720p is 1280 × 720 pixels.
- 1080p is 1920 × 1080 pixels.
- 4K UHD is 3840 × 2160 pixels.
Moving from 1080p to 4K doubles each dimension and creates four times as many pixels. Going from 720p to 4K triples each dimension, producing nine times as many pixels.
Those are pixel-count increases, not guarantees of four or nine times more useful detail. Compressed file size does not follow those ratios automatically either.
Three different processes often get described as “making it 4K.”
Resizing the frame
An editor can enlarge footage to fit a bigger output canvas. It calculates additional pixel values from the existing image. This changes the dimensions, but it does not recreate a higher-resolution original.
A 1080p clip exported from a 4K timeline is therefore not proof that a dedicated AI enhancement process occurred.
Enhancing with AI
An upscaler uses a trained model to estimate detail and address particular image problems. Depending on the model, that can involve sharpening, noise reduction, compression cleanup or more substantial reconstruction.
The important distinction is between preserving the existing image and inventing a more detailed interpretation of it. Adobe’s Astra documentation explicitly separates a preservation-oriented Precise mode from a Creative mode that can introduce new details. Adobe’s enhancement-mode explanation
Generating at a higher output resolution
Selecting a higher-resolution generation option is another route. However, the file dimensions alone do not tell you how a provider produced them.
Check the exact model and access platform’s documentation before describing an output as native 4K. Do not assume that a resolution selector proves the absence of internal upscaling.
Choose the destination before the upscaler
“Highest available” is not a useful delivery brief. Decide where the film will be watched, whether it will be cropped, and what the recipient actually requires.
Keep 1080p when it already does the job
A clean 1080p master may be sufficient when the intended delivery accepts it, the framing is settled, and no meaningful improvement survives normal viewing.
Judge the improvement in the actual viewing context, whether that is a quick approval on a phone or a larger display.
Consider 4K when there is a reason
A larger master can be useful for large-screen playback, a specified 4K delivery, or a workflow that needs additional reframing flexibility.
Upscaling can supply the required dimensions, but whether it supplies convincing detail is a separate question. If a client requires native-resolution footage rather than an upscaled deliverable, agree on that distinction before production.
Repair or replace the shot when structure is wrong
An extra finger, a changing face or an object passing through a hand is not simply a resolution problem.
A more detailed version of the same error is still the wrong shot. Re-edit, use another take or revisit generation when the defect affects the action or identity. The cinematic AI video prompt guide covers the upstream direction that enhancement cannot substitute for.
Find where quality was lost
Before paying for an upscale, compare three things:
- The original downloaded generation.
- The file exported from your editor.
- The version playing on the publishing platform.
If the original is already weak, investigate the source or a targeted enhancement. If only the export looks poor, check export settings, scaling and whether the editor used lower-quality media. If only online playback looks poor, investigate processing and playback quality first.
This distinction can save a pointless round of enhancement. YouTube initially processes uploads at lower quality, with higher-resolution versions becoming available later. A temporarily missing 4K option does not establish that your export failed. YouTube’s processing guidance
Always start from the best available original, not a screen recording or a copy downloaded from a social post.
The detail to protect is not always the sharpest detail
Cinematic images contain deliberate softness: shallow depth of field, diffusion, motion blur and restrained texture. None of those automatically needs correcting.
Consider a close-up with an in-focus eye, gently rendered skin and an out-of-focus background. Making every surface equally crisp can reduce the separation that made the image work.
Check four areas before accepting an enhanced shot.
Faces and identity
Compare the shape of the eyes, mouth, hairline and facial silhouette. Watch the face turn, not just its best frozen frame.
Topaz’s documentation acknowledges that some enhancement can overinterpret small faces or produce overly sharp background texture. A more conservative result can be preferable to maximum apparent detail. Topaz enhancement documentation
Materials
Look for unnaturally coarse fabric, waxy skin or new patterns on smooth surfaces. The added texture should fit the material, not just look impressive at high zoom.
Focus and motion blur
A soft background may be intentional. So may the blur along a fast-moving hand.
Some models can mistake blur for texture. Topaz specifically identifies heavy motion blur as a limitation for its Starlight Precise 2.5/2.6 family. That is a reason to preview the difficult movement, not assume a high-quality preset suits every shot. Starlight Precise limitations
Stability between frames
Inspect whether enhanced detail stays attached to the object as it moves. Watch for crawling textures, flickering edges or facial details that change between frames.
A beautiful still is not enough to approve a video.
Use a small comparison before processing the whole film
The following is a suggested evaluation method, not a report of a PewdenAI benchmark.
Choose a short section that contains the most revealing parts of the shot: a face turning, a hand crossing an object, fine fabric or difficult lighting. Use enough of the action to assess movement rather than choosing only an easy, nearly static frame.
Create three candidates where your editor or upscaler permits:
- Original: the untouched source.
- Basic resize: an ordinary export at the intended delivery size.
- AI enhancement: one conservative upscale from the same source.
The basic resize is the control. Without it, a larger preview can be mistaken for better processing.
Compare candidates at the same displayed size and in the same player. First watch at normal speed. Then inspect relevant areas at pixel level. Finish by viewing the sequence at its intended delivery size.
Use the exported files rather than differently compressed online previews.
Accept the AI version only if it:
- Improves something that matters to the shot.
- Preserves the approved face, object and composition.
- Holds together in motion.
- Fits the production’s time and processing budget.
If the improvement is only visible at an extreme zoom that no viewer will encounter, it may not justify another processing pass.
How to upscale AI video without losing the original look
1. Finish the shot selection first
Work out which takes survive the edit before enhancing every generation.
For shots that will be replaced, the best upscale is no upscale. Keep a little extra footage around selected edits when transitions or later trims require it. If you plan to use a cloud tool for confidential client footage, check the client’s approval and the service’s current upload and retention terms first.
2. Define what must not change
Write a brief preservation note for the shot.
For example: keep the face, dark wool texture, soft background, subdued highlights and existing motion. Improve distracting compression around the hair without making the whole image harsher.
This makes approval more useful than simply asking whether the result looks “better.”
3. Start conservatively
Choose a mode intended to preserve the source. Add stronger reconstruction only when you can explain what problem it solves.
As one current example, Firefly’s upscaling controls offer 1080p and 4K outputs, with Precise/Creative enhancement choices. Its documentation recommends Precise with Subtle detail for a natural starting point. Treat that as a product-specific starting point, not a universal preset. Firefly upscaling controls
Do not copy slider values from unrelated footage and assume they are a professional standard.
4. Change one major variable at a time
Evaluate enhancement strength separately from frame-rate conversion, heavy sharpening and a new grade.
If everything changes at once, it becomes difficult to identify which process improved the footage and which introduced the problem.
5. Return approved clips to the edit
Check the enhanced shot against its neighbours. An individually crisp close-up may feel wrong beside softer, atmospheric coverage.
Evaluate the sequence’s texture and contrast as a whole. Preserve the original clips so you can reverse a decision without rebuilding the project.
6. Add final graphics cleanly
Where possible, keep editable titles, subtitles and logos separate from the footage enhancement. Render them at the final delivery size in the edit.
Do not ask an upscaler to preserve tiny baked-in lettering when you still have the clean graphic source.
7. Inspect the actual export
Watch the exported file from beginning to end. Check framing, duration, colour, audio, transitions and the parts that were difficult before enhancement.
A good preview is not the same as a verified final file.
Upscaling and frame interpolation are different decisions
Upscaling increases spatial resolution. Frame interpolation creates additional frames to change motion sampling or produce slow motion. Topaz documents interpolation as a separate process. Frame interpolation explained
A 4K file does not need to be 60 fps. Changing both at once can change the film’s motion character as well as its detail.
Keep the established frame rate unless a delivery requirement or a deliberate creative decision calls for conversion. With mixed-frame-rate footage, plan the timeline and any conversion explicitly rather than choosing the largest number at export.
When testing interpolation, examine fast movement, overlapping objects and cuts. Keep the original audio separately, since some interpolation workflows export video without sound. Confirm that sound and duration still match the edit.
A vertical crop changes the resolution calculation
Resolution should be evaluated after the intended crop, not only from the source filename.
A full-height 9:16 crop from a 1920 × 1080 landscape frame uses approximately 608 × 1080 pixels. Exporting that crop at 1080 × 1920 enlarges it again.
That calculation assumes a simple crop, square pixels, no rotation and no extra reframing. It explains why a “1080p source” can look softer than expected in a full-screen vertical deliverable.
If you need both landscape and portrait versions, plan the compositions early. Upscaling does not bring back a hand, face or environment that the crop removed.
Protect the upscale during delivery
Use an export suitable for the destination. Higher resolution, frame rate, bitrate and colour space solve different problems; they are not interchangeable quality switches.
For an SDR YouTube upload, its published recommendations include H.264 in MP4, the established source frame rate and BT.709 colour. Its reference video bitrates are 8 Mbps for standard-frame-rate 1080p and 35–45 Mbps for standard-frame-rate 4K. Higher-frame-rate recommendations differ. These are YouTube upload guidelines, not universal client-master settings. YouTube’s encoding recommendations
Keep an appropriate high-quality master before making smaller distribution copies. Avoid repeatedly editing and exporting an already compressed delivery copy when the original project is available.
If colours change between the file and online playback, investigate colour-management and metadata rather than applying more sharpening. YouTube colour troubleshooting
Deliver a web-friendly version for a website when appropriate; the archive master does not have to be the file every visitor downloads.
Questions filmmakers ask about AI video upscaling
Should I generate at low resolution and upscale later?
It can be a practical route for some shots, but do not assume it is always cheaper or equally good. Include failed upscales, processing time and extra review in the comparison. Test a representative shot before committing a whole production.
Should I upscale before or after editing?
Select the useful shots first, then enhance those that need it. That avoids processing rejected takes. Keep original media and enough handles for the edit; effects-heavy workflows may require a different order.
The final decision
4K is worth using when it serves the delivery and the improvement holds up in motion. It is not worth chasing when it changes the character, destroys intentional softness or adds processing without a visible benefit.
Choose the frame size for the destination. Choose the enhancement for the actual problem. Keep the version that makes the film work.