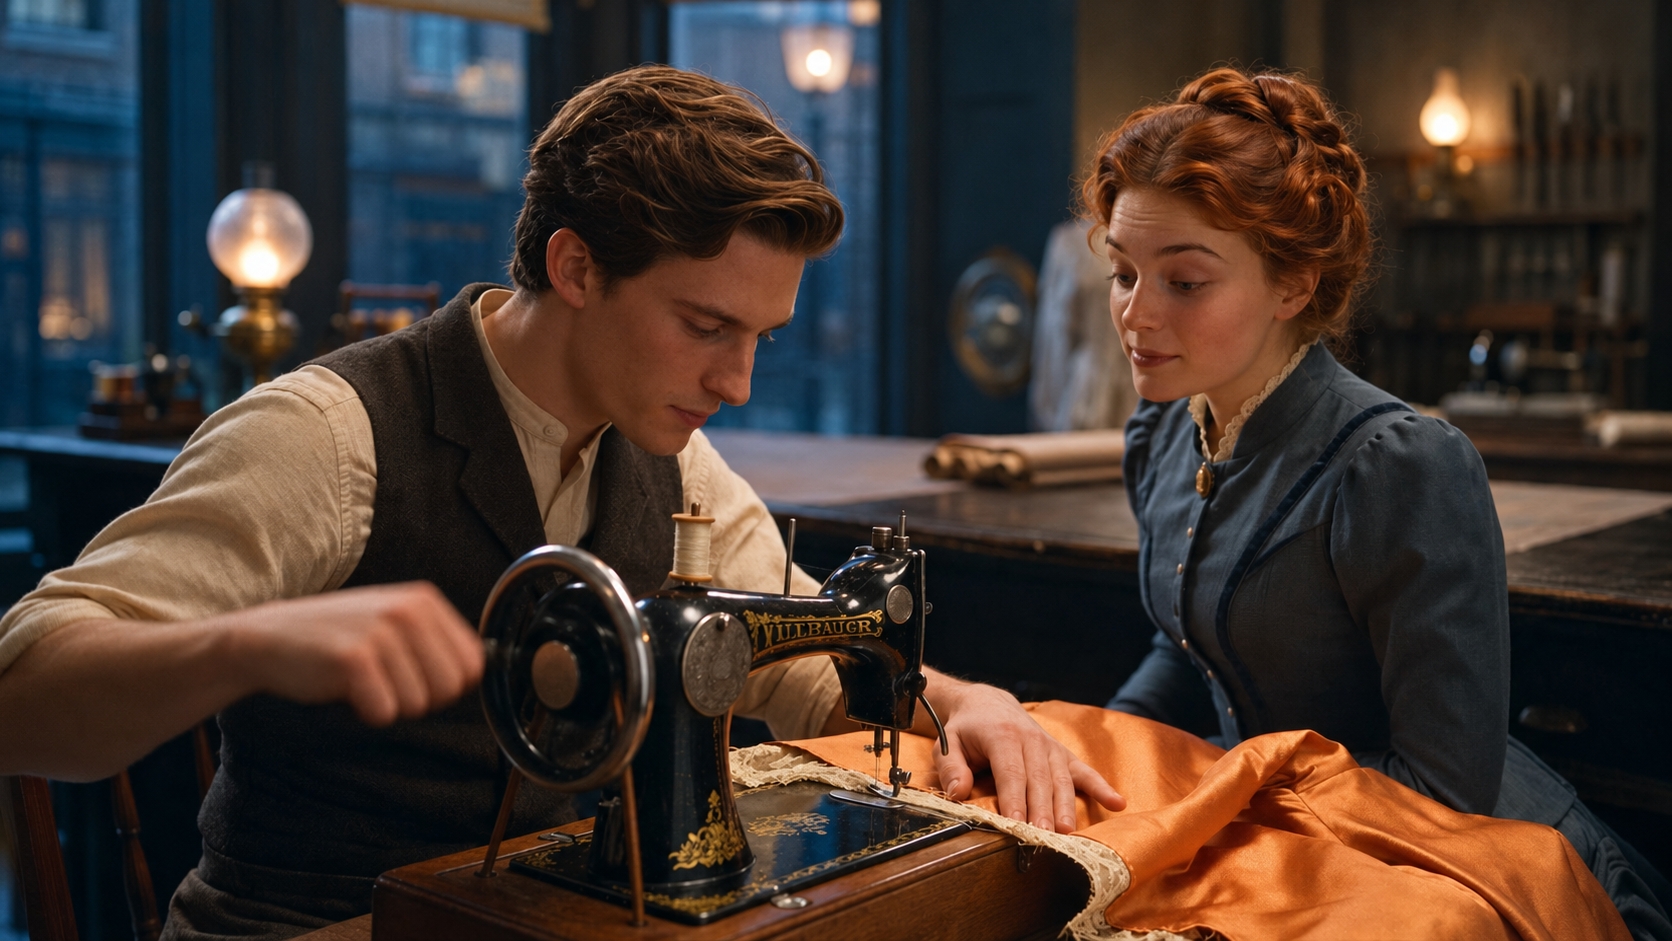
In my first usable-looking take of The Tailor’s Promise, the tailor lifted his own sleeve to show off a repair he was supposed to make on a gown. The faces and lighting held up. The story broke because the lace ended up on the wrong garment.
Start with the first frame where the action stops making sense. Name the actor and the exact object they should touch, then describe where that object should be and what condition it should be in after the cut. The same check works for a bottle cap that reappears, a prop that changes hands, or a coat that changes between angles. If the source image already shows the wrong state, fix that frame before generating again.
Diagnose the error before you rewrite
Watch the action once at normal speed. Then inspect the frame just before contact, the moment of contact, and the first clear frame after the cut. Check the actor, the object they touch, where it is, and what state it is in. The last good frame tells you what the next shot needs to inherit.
- Wrong object or person. Name the actor and the target together. “The mechanic lifts the loose red cap from the bench” is easier to check than “he picks it up.” Add a location or visible feature that distinguishes the target from similar items.
- Correct object, wrong state. Describe the following shot as it should begin. If the previous shot ends with the bottle open and the cap in the right hand, both details belong in the next shot’s opening direction.
- Object changes design or disappears. Check whether it is visible in the source frame, especially if it passes behind a hand or another prop. If the mode accepts separate references, use a clear image of the object. Shorten or reframe the action if the important contact happens out of view.
- Wrong outfit or face after a cut. Compare the final clear view in the earlier shot with the first clear view in the next one. Use a compatible identity or wardrobe reference where the tool supports it. If the reference itself shows a different look, update it before adding another instruction.
Watch the mistake and the corrected take
For The Tailor’s Promise, my 30-second Seedance 2.5 musical, a customer brings a copper-orange gown to a Victorian tailor. She wears blue, the tailor wears cream, and the loose orange garment is the one that needs repair.
The rejected generation
At 00:06 to 00:08, watch the customer’s worn sleeve while the loose gown sits on the table. At 00:25, the tailor presents lace on his own forearm. The reveal is where the mix-up becomes impossible to miss.
The selected final cut
Watch the same moment around 00:25. The tailor lifts orange fabric with ivory lace attached, and the customer looks at the garment he is holding. The two frames below show exactly where the lace ended up in each take.
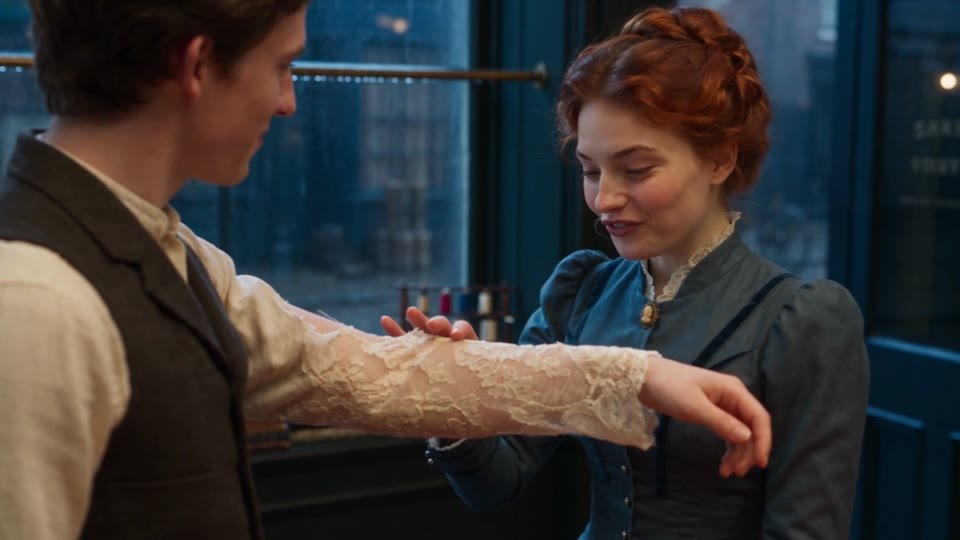
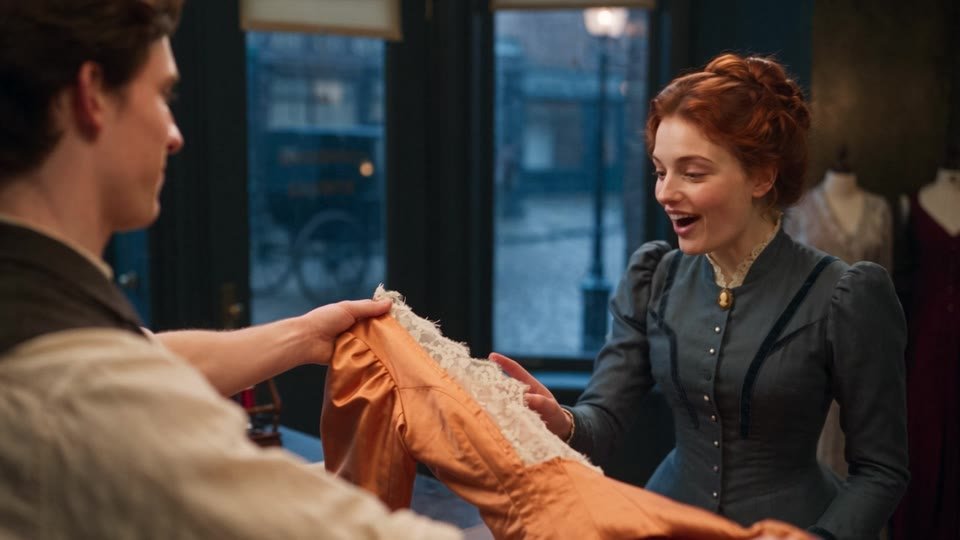
What I changed in my Seedance 2.5 prompt
I named the target at the point of contact. The original brief already said that the orange gown was separate. Inside individual beats, wording like “lifts the torn sleeve” left room for the wrong garment to get the action. The revised direction identified the actor, the loose cuff and the table in the same instruction. The repair inserts carry that same orange fabric forward.
Before. The customer lifts the torn sleeve to show the tailor the damage.
Revised direction, adapted from the production notes. She uses her fingertips to lift the empty cuff of the copper-orange gown lying on the cutting table. Her own blue sleeve stays separate. The camera keeps the cuff visibly attached to the loose gown.
I tested two ways to distinguish the garments. One prompt explicitly kept repair lace off the characters’ worn cuffs. A separate test used two character references plus a gown reference with front, back, folded, flat, damaged and repaired views. That version allowed the customer’s existing wardrobe details to stay and made the repair lace belong specifically to the loose gown. The principle transfers to any scene with two visually similar objects. Give each a distinct job and make the intended target visible.
I made the reveal a physical action. One revision asked the tailor to lift the unworn gown by both shoulders so its empty sleeves and skirt would hang naturally. I kept the take where the tailor worked on the loose copper fabric through the repair sequence and the lace stayed attached to that fabric when he lifted it. That detail closes the story. The customer can finally see the repair she came in for.
A reusable prompt for any genre
Adapt this to a new generation, a reference-led shot or a replacement insert. Fill in only the details the next shot needs.
Starting state. [Actor] is at [location]. [Target object, with a distinguishing detail] starts [position, owner and condition]. [Similar object] stays [its own position or owner].
Action. [Actor] uses [hand or tool] to [one visible action] on [the exact target]. Frame [the point of contact] so the viewer can see which object moves.
End state. [Target] ends [new position, owner and condition]. Carry that state into [next shot]. Preserve [the specific wardrobe, identity, framing or lighting details that matter].
Three ways to use it outside this film
- Product ad: The right hand unscrews the matte black cap from the amber bottle. The hand puts that cap on the tray to the left. In the next shot, start with the amber bottle open and the cap still on that tray. A second closed bottle stays behind it.
- Sci-fi short: The engineer removes the red battery from the left console slot and places it on the workbench. Begin the reverse angle with the left slot empty and the red battery on the bench. Keep the blue module installed on the opposite side.
- Cooking clip: The cook tips the small glass bowl of chopped herbs into the pan. Show the bowl empty after the pour and keep the larger bowl on the counter. The next close-up starts with the herbs already in the pan.
In each example, you can inspect the result without judging style or realism. You know which object moved, where it landed, and what should be visible after the cut.
Choose the smallest repair that solves the problem
- Rewrite the action if the right objects are already in frame and the model chooses the wrong one. Test the narrower instruction with the same starting image and settings where practical.
- Change the reference or framing if the target is hidden, too similar to another object, or cropped out before the hand reaches it. A wider establishing frame or a dedicated prop reference can make the interaction easier to see.
- Replace a shot or add an insert if the entire action changes the wrong object. Establish the intended state before the cut and show the result after it. This often leaves the shots with good performances available for the edit.
- Use a local edit if the action is already correct and the problem is confined to a small visible detail. Check whether your generation mode exposes that control. Seedance 2.5 documents reference-driven editing, including changing a specific element while preserving the surrounding shot. Seedance 2.5 documentation
Before you render another take, write one sentence that defines success. For the tailor scene, it was “the ivory lace is attached to the copper gown when he lifts it.” In your scene it might be “the same key moves from the left character’s right hand into the other character’s palm.” Check that one beat first. Then review the rest of the cut for new errors.
For planning a full sequence, see the cinematic multi-shot prompt guide. Once the story reads clearly, use the AI video upscaling guide to decide whether the delivery resolution needs another pass.